MP Photoshop Process
So, after today's presentation in class of our websites and blogs on major project Zoya and Lucy suggested me to use more digital effects and try to make the same marks as I used on printed versions but in photoshop.
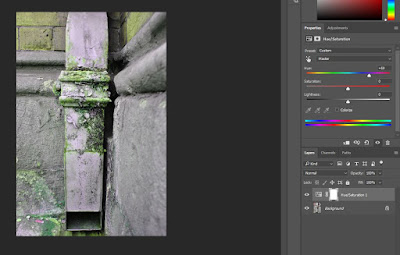
In the presented above pictures using Photoshop programme on the original picture I tried changing the Hue so I could contrast the colours and change them to get a very vivid image.
In this picture I tried a variety of colour range, I increased the fuzziness up to 150 percent in the first picture, which is in black matte selection and the range is 85 percent as can be seen on the screenshot. I liked this more than in red and I think that I am going to work on the black further, in red I like the effect but it is came out too bright in my view.
I found this picture of splash online and I instantly thought that it looks similar to the rust on the picture that I have taken, so, I photoshopped it on the picture and united them. I also added effects on the photo. First I made curve adjustments.
To make a pinkish effect I played with colour balance, I think that it came out looking attractive in terms of colour because I present this rusty, ugly pipe and warm pink colours change the overall look.

Tom in the Art Factory showed and taught me a very valuable and new tool on photoshop today.
By using a 'define brush' it automatically selects the area as a brush so, basically, you can stamp on any other picture just like a brush.
 The thing that I wanted to do at first is to photoshop on the original picture to make burns on to it like I did on the printed version but that I realised that I can combine the original picture and put a new layer as this picture with burns just reducing the opacity. I think it came out pretty good, as I expected it to look.

Moving on to the next image, by looking at this crack I thought that I was looking at clouds. Clouds are very pure and cannot possibly be compared to ugly crack however, I want to show the beauty in imperfection. I took the picture of clouds myself, then I combined the layers, cut the clouds and erased unnecessary parts of the picture by using the eraser tool, I also reduced the opacity to make the final picture look more natural and not photoshopped.
This was a failed try of photoshopping fire on to the photograph it looks unnatural and does not make any common sense in my view. Anyway, I used a picture of fire from internet, then used a magic tool to select the needed part and increased the tolerance to get a more precise selection. The next step was copying layer via cut and copy pasting it on the main picture. 

In the previous blog I presented the process of using candle wax on one of the printed version of my final pieces, as I was suggested to do it digitally I decided to use another thing instead. I took a cardboard and melted the candle and got the drops I tried to put the cardboard vertically to get a nice dripping effect. So, after that I took a picture, as I don't have my own camera, I have no access to loan a camera before the submission day. I should have thought about it earlier but finally I had to take a picture of the board on phone. Then I opened it on the photoshop used a 'select a define brush' in 'edit' as previously was taught by Tom, I made the drops only as a brush and placed it on the wall photograph. I made the color green because I thought that it looks very natural.
I tried out experimenting with various effect, I liked this particular one. I thought of making something interesting and trying to find a connection to nature I struggled to do so. I wanted to leave it like this but then I flipped the image and realized that it actually looks like a map.
I used magic tool to select areas of picture and after that I used paint to color it in suitable colors. I think that it came out good and if I have more time I will try to work on it more.


Comments
Post a Comment